

Connect an iMessage Line
Learn how to connect your Mac as a high-trust iMessage line for your GoHighLevel sub-account.
Overview
Connecting an iMessage line allows you to send "blue bubble" messages directly from your Mac through GoHighLevel. This is ideal for reaching Apple users with high-quality media, read receipts, and the extreme trust of an iMessage connection.
- Active WhatSnap account
- Available line slot in your plan
- Mac computer (macOS 11+)
- iPhone with an active carrier plan
- Fundamental: Both Mac and iPhone must use the exact same iCloud account.
Don't have a Mac? You don't need to buy one. Our partner HostMyApple rents cloud Macs (virtual or dedicated) that work with WhatSnap, and the code p2p15 gets you 15% off. You still need your iPhone with its active carrier plan; sign the rented Mac into the same iCloud account.
Important: Your iPhone must have an active carrier plan. While iMessages can be sent even if the phone is off, the device must be on to send messages to non-iMessage users (Android) via SMS fallback.
Step-by-Step Connection Guide
Follow these steps to link your Mac to your sub-account.
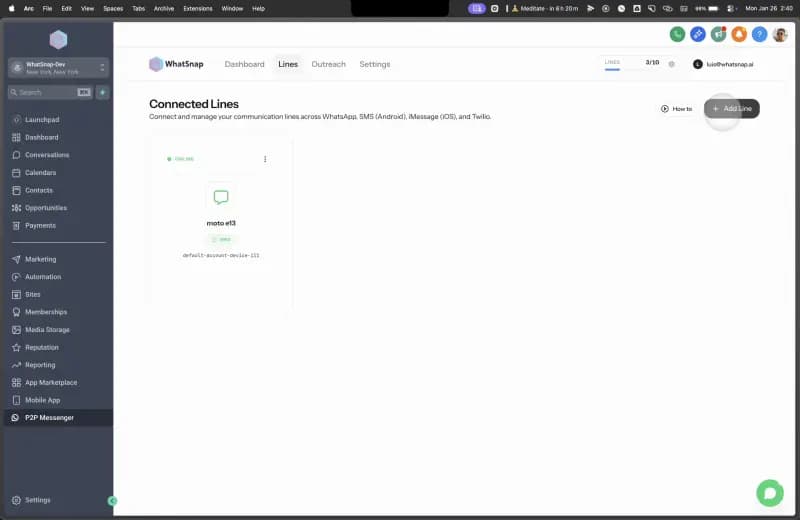
Access the Add Line trigger
Open your WhatSnap dashboard from the Agency View or directly within your sub-account. Click on Add Line to begin.
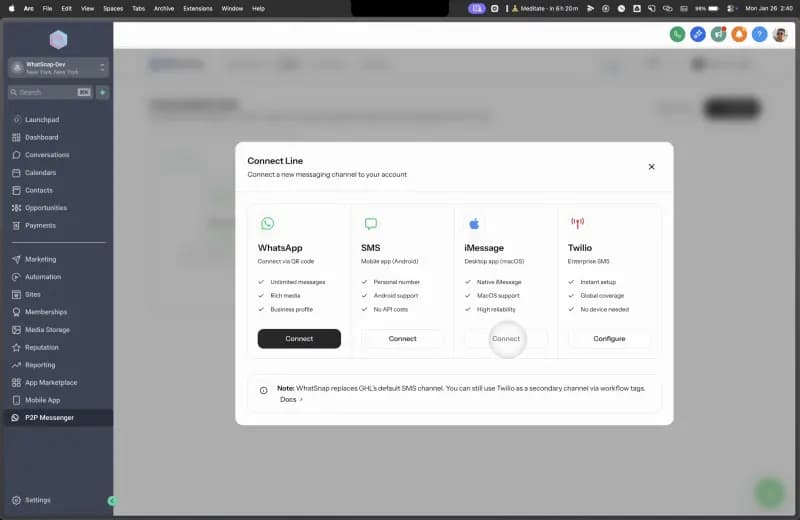
Select iMessage
In the connection modal, select iMessage as your messaging channel.
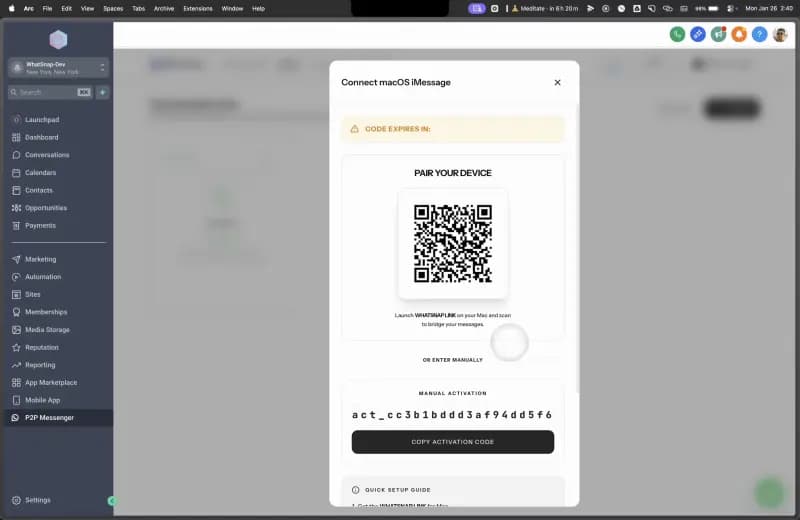
View activation details
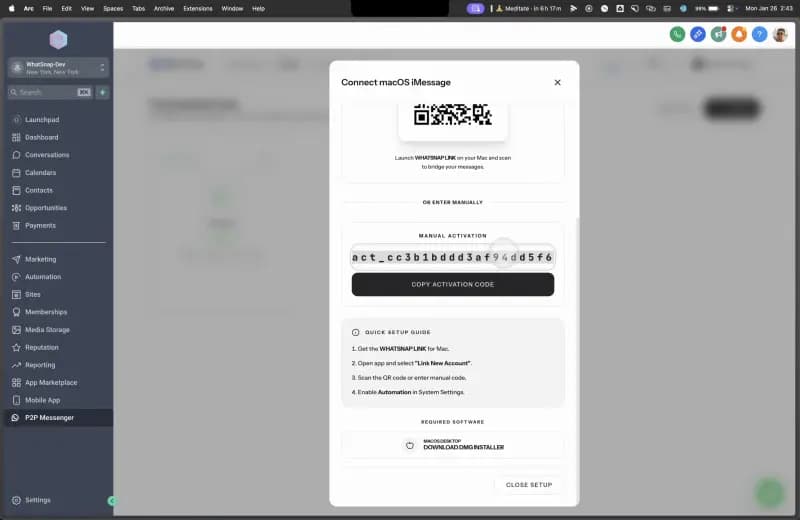
The Connect iMessage modal will appear, displaying a QR code and an activation code. You will need to scroll down within this modal to find the download link.
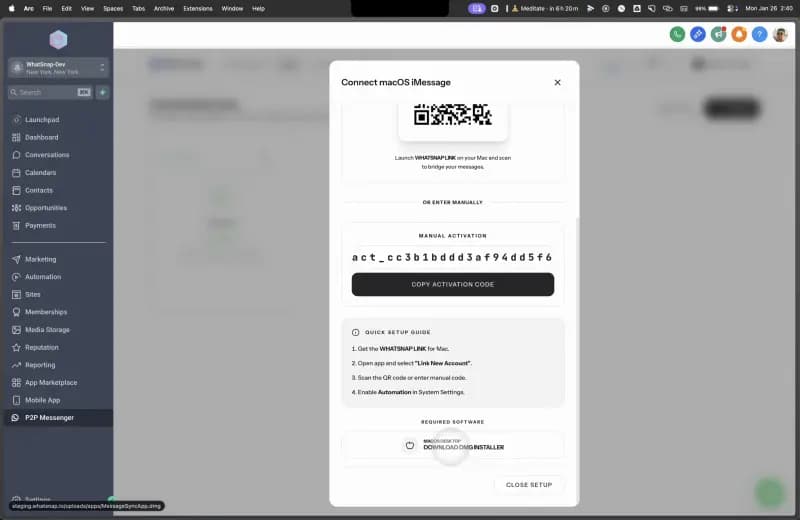
Download the installer
Scroll to the bottom of the modal and click the Download Installer button to get the MessageSyncApp.dmg file.
Open the DMG file
Locate the downloaded MessageSyncApp.dmg in your Downloads folder and double-click it to mount the installer.
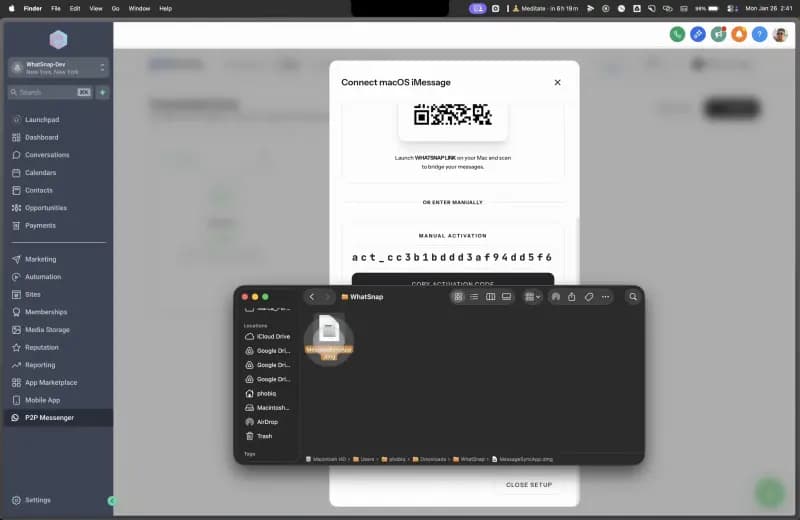
Install the app
Drag the MessageSyncApp icon into your Applications folder.
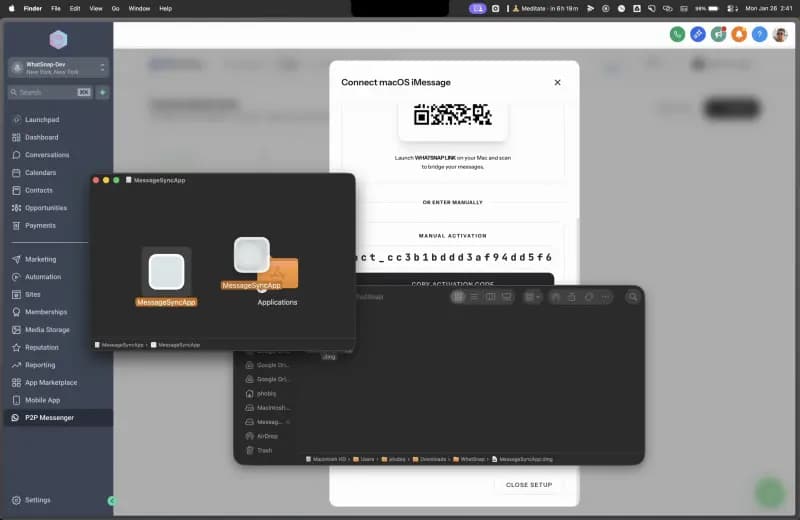
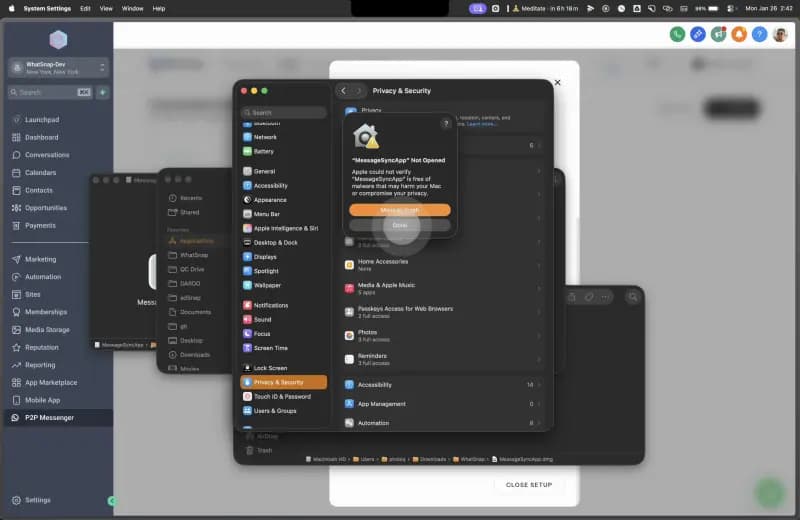
Allow the app through the macOS security prompt
Open your Applications folder and launch the app. macOS will likely show a warning stating that "Apple could not verify MessageSyncApp is free of malware." Click OK or close this modal for now—we will authorize it in the next step.
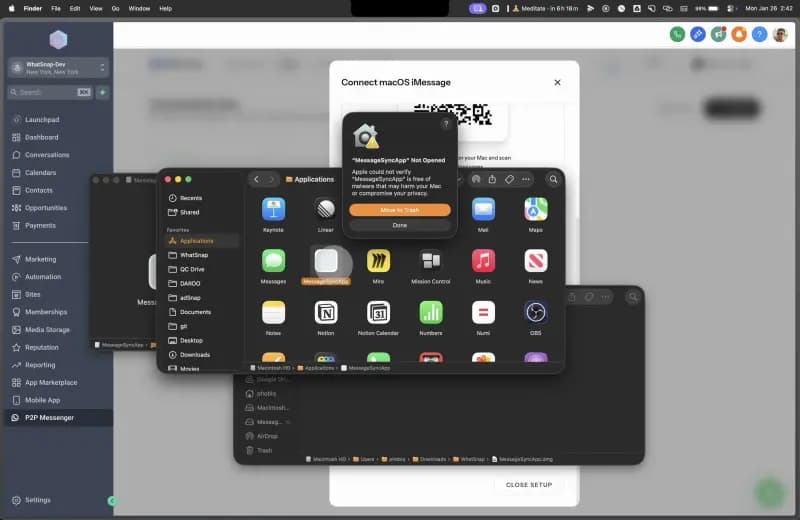
Open Privacy & Security settings
Open your Mac's System Settings and navigate to Privacy & Security.
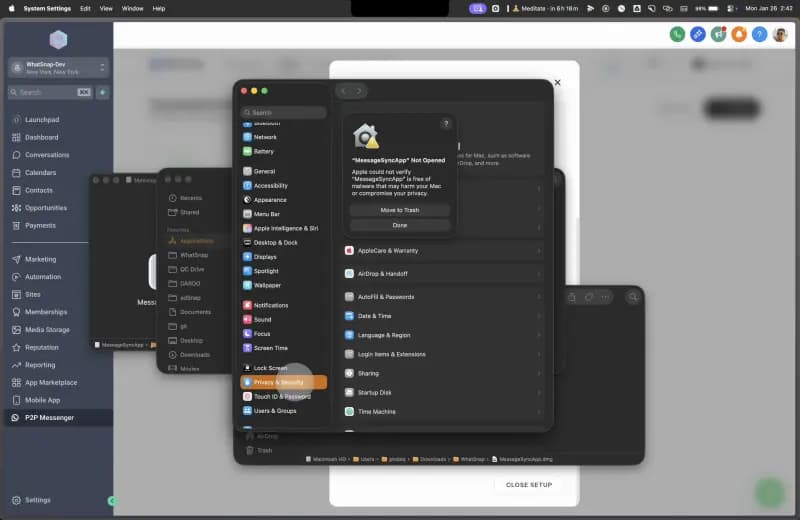
Confirm the warning
Go back to the warning modal on your screen and click Done (or close it) to ensure the "Open Anyway" option appears in your system settings.
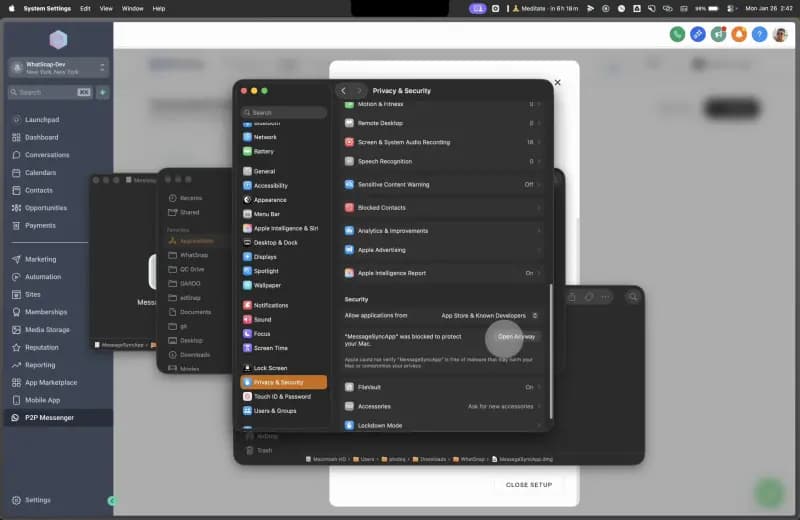
Authorize "Open Anyway"
In Privacy & Security, scroll down to the Security section. You should see a message about MessageSyncApp being blocked. Click Open Anyway.
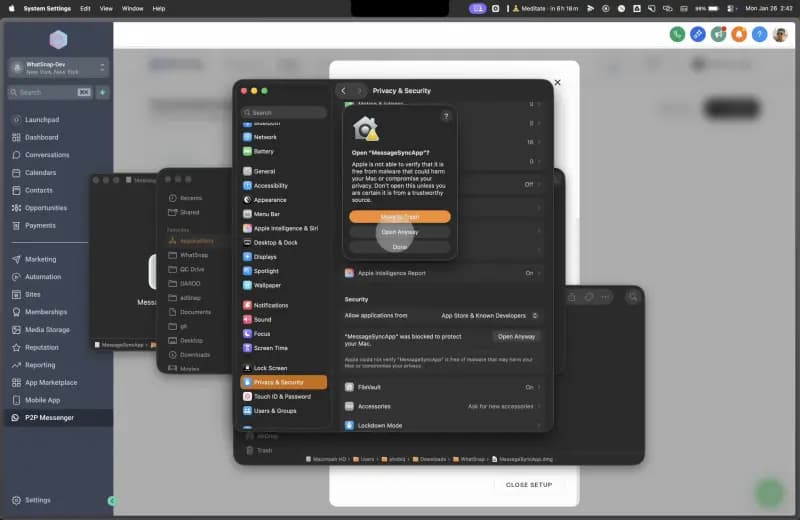
Final confirmation
Confirm your choice in the final security modal by clicking Open Anyway again.
Copy the activation code
Return to your WhatSnap dashboard and copy the Activation Code.
Open the app from the toolbar
The MessageSyncApp often hides in the macOS top toolbar (look for the 🌐 icon). Click it and select Open.
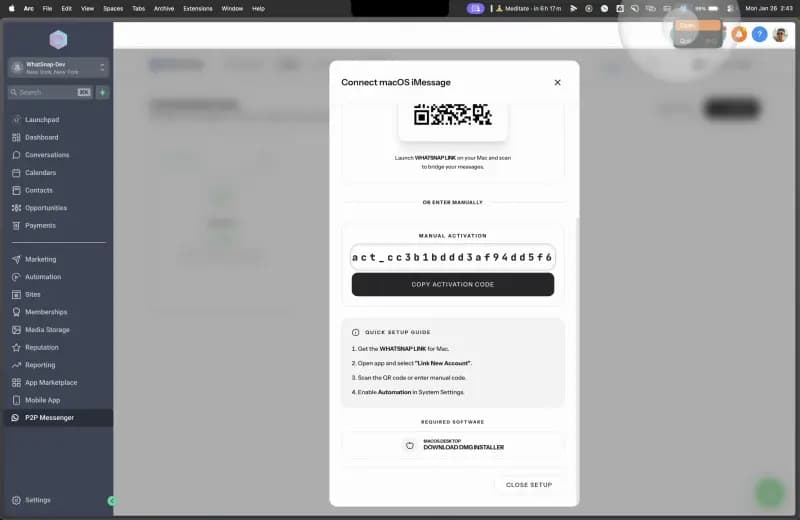
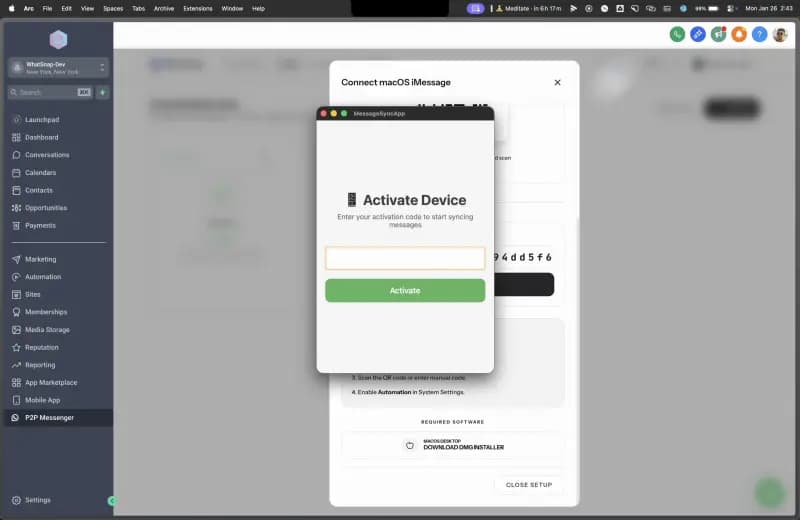
Paste code and grant permissions
Paste the activation code into the app's input field. If this is your first time, the app will guide you through granting permissions for Full Disk Access and Automation so it can sync with your Messages app.
Connection Successful!
Congratulations! Your Mac is now successfully bridged to WhatSnap. You will see the status change to Connected in your dashboard.
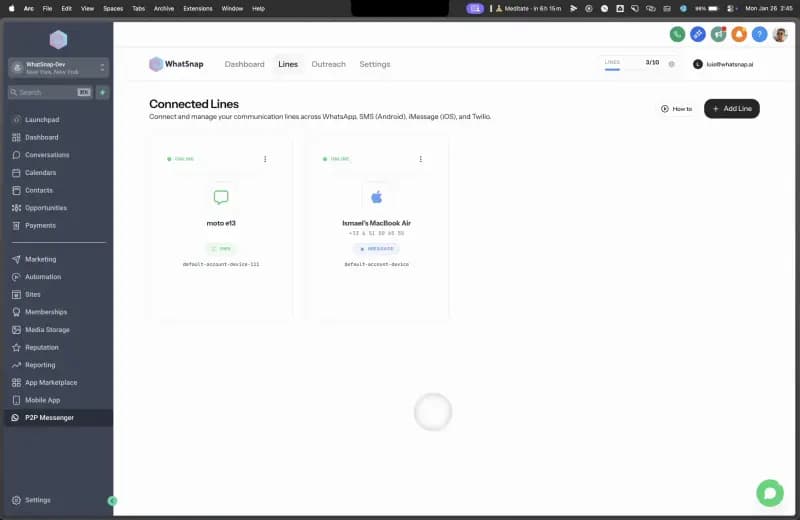
iMessage active! The bridge is now established. To ensure messages are sent and received correctly from your phone number, complete the final mobile configuration steps below.
Final Mobile Configuration
While the Mac bridge handles the connection, you must configure your iPhone to ensure messages use your phone number and support SMS fallback for non-Apple users.
Open iPhone Message settings
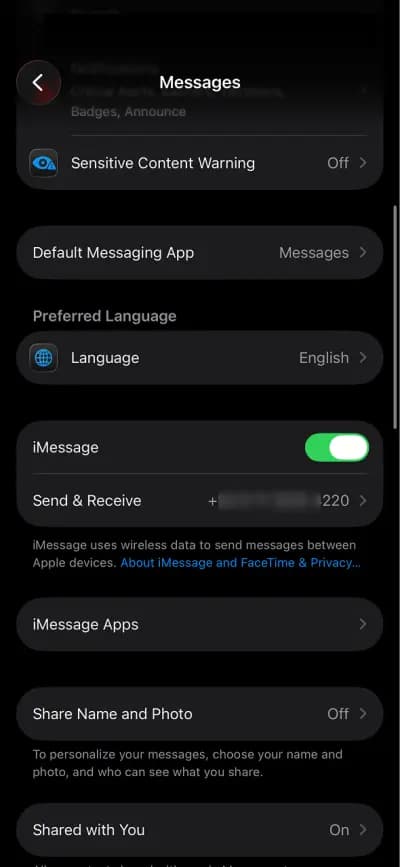
On your iPhone, open the Settings app and search for or navigate to Messages.
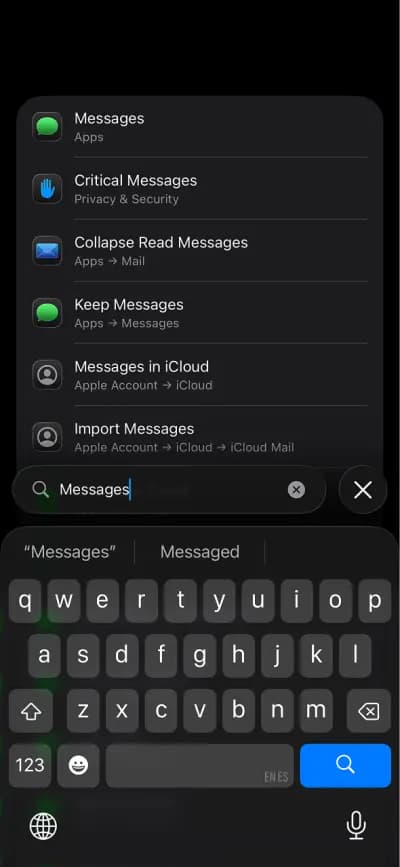
Configure Send & Receive
Ensure iMessage is toggled ON, then tap on Send & Receive.
Select your phone number
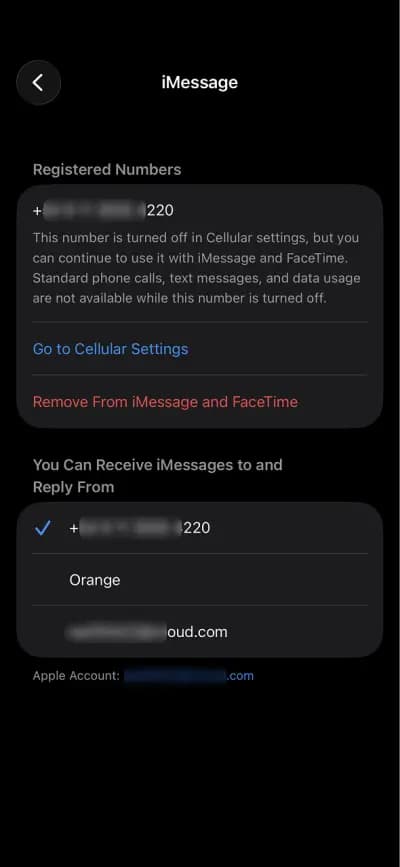
In the "Send & Receive" menu, ensure your phone number is selected as the primary source for sending and receiving messages. This ensures your iMessages come from your number rather than an email address.
Pro Tip: Customize your iMessage profile with your photo and name. Keep Share Name and Photo turned on so users who receive your iMessages see your professional profile (highly recommended for trust).
Best Practices
To ensure maximum deliverability and account safety on iMessage, we recommend:
- Keep your Mac awake: Use the Display Settings to prevent sleeping.
- Volume Limits: We recommend sending no more than 50 outbound messages to new contacts per day. While there is no limit on received messages, avoid using your line for spam.
- Scale Responsibly: If you need more volume, connect multiple lines and rotate them.
- Multi-User Setup: A single Mac can host multiple iCloud sessions simultaneously by using different macOS user accounts. See our macOS user switching for more details.
- Media Optimization: Take advantage of high-quality attachments.
Related
Last updated on July 11, 2026